Weave a World of Words: Easy Weaving Crafts for Kids
 By Speech Blubs Team•Jan 13, 2026•23 min.
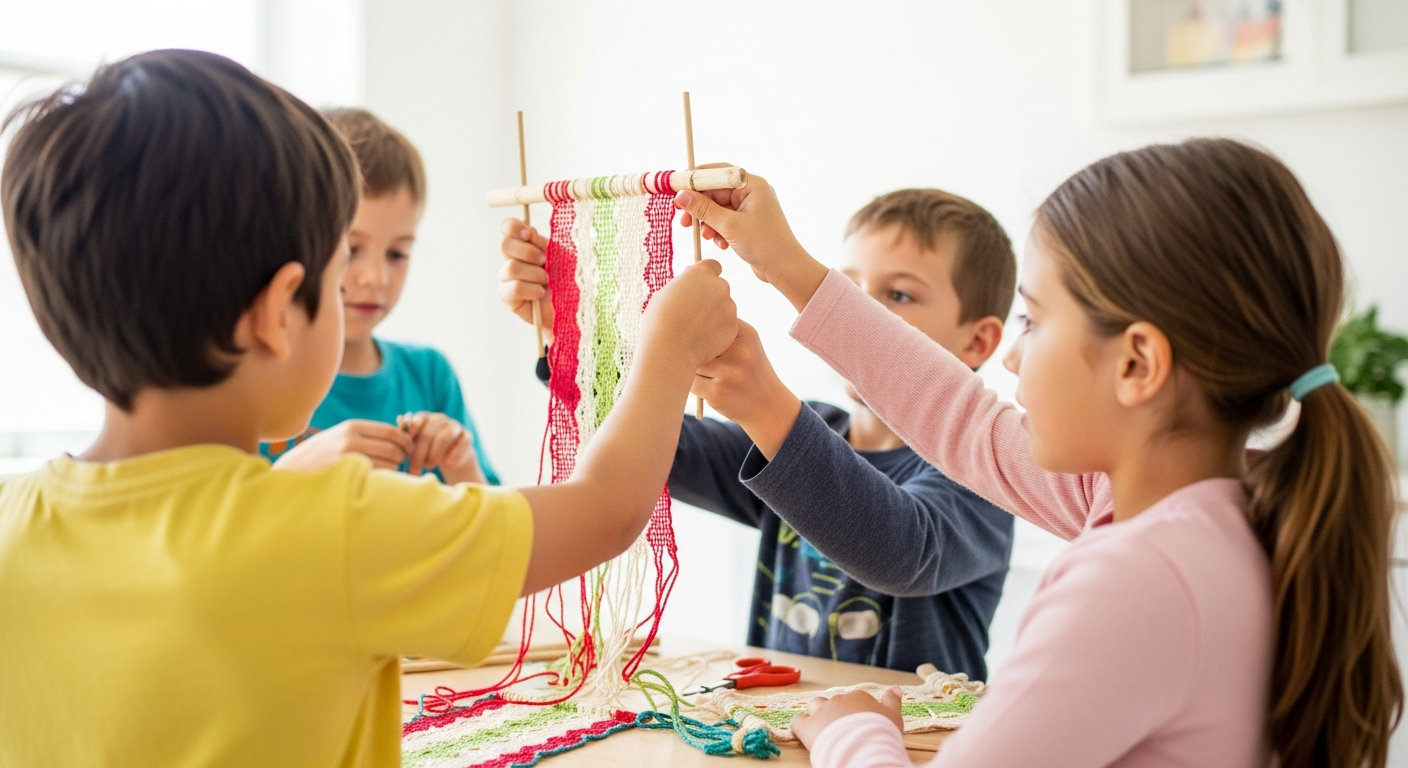
Table of Contents
- The Magic of Weaving: More Than Just String and Fabric
- Weaving Fundamentals for Little Hands: Key Terms Made Simple
- Gathering Your Weaving Toolkit: Easy-to-Find Supplies
- Our Favorite Easy Weaving Crafts for Kids: Step-by-Step Guides & Creative Ideas
- The Speech Blubs Difference: How We Support Your Child's Journey
- Conclusion
- FAQ: Your Weaving Questions Answered
Have you ever seen a child’s eyes light up, completely immersed in a task, their small hands bringing something new and beautiful into existence? In a world increasingly dominated by flashing screens and passive entertainment, there's profound magic in the tangible act of creation. Weaving, an ancient art form, offers just such an experience – a captivating journey that engages little hands, stimulates growing minds, and lays foundational groundwork for crucial developmental milestones, including communication. Today, we’re going to unravel the delightful world of easy weaving crafts for kids, exploring projects that are not only fun but also incredibly beneficial for their development, much like the journey of discovering their voice.
At Speech Blubs, our mission is to empower children to speak their minds and hearts, and we believe that every joyful, hands-on activity contributes to this grand adventure. Our company was born from the personal experiences of our founders, who all grew up with speech problems and created the tool they wished they had: an immediate, effective, and joyful solution for the 1 in 4 children who need speech support. We blend scientific principles with play into one-of-a-kind "smart screen time" experiences, offering a screen-free alternative to passive viewing and a powerful tool for family connection. The skills children develop through engaging crafts like weaving – patience, fine motor control, cognitive sequencing, and creative expression – are wonderful complements to the communication skills we help foster every day. This post will guide you through simple, accessible weaving projects, demonstrating how these activities can spark creativity, build confidence, and even pave the way for clearer communication.
The Magic of Weaving: More Than Just String and Fabric
Weaving is far more than just looping yarn; it's a rich developmental playground that offers a surprising array of benefits for children. It's an activity that naturally enhances skills vital for overall growth, including those essential for effective communication.
Building Dexterity and Fine Motor Control
Consider the intricate movements involved in weaving: grasping, pulling, pushing, and threading. These actions are powerful exercises for developing fine motor skills – the precise coordination of small muscles in the hands and fingers. Strong fine motor skills are crucial for tasks like writing, drawing, buttoning clothes, and using utensils. More importantly, these skills translate directly to the dexterity required for speech articulation, where the small muscles of the mouth, tongue, and jaw perform incredibly precise movements to form sounds. Just as children learn to manipulate yarn with increasing control, they are also refining the foundational skills needed for clear speech.
Nurturing Patience and Focus
In a fast-paced world, weaving stands out as a calming, meditative activity. It requires sustained attention and patience as children learn to follow a sequence of "over, under, over, under." This deliberate process teaches them that beautiful results come from consistent effort and focus. This practice in concentration can significantly improve attention spans, a vital skill for listening, understanding, and participating in conversations. These are the quiet moments where children learn to settle into a rhythm, fostering a sense of accomplishment that builds their confidence.
Igniting Creativity and Problem-Solving
Weaving is a blank canvas for a child's imagination. They choose colors, textures, and patterns, making decisions that directly impact their creation. Experimenting with different materials and observing how colors interact encourages design thinking – identifying a goal, brainstorming solutions, executing a plan, and evaluating the outcome. This hands-on problem-solving hones their cognitive flexibility and fosters a sense of personal expression. This creative outlet mirrors the journey of self-expression in communication; just as they choose colors to express an idea in weaving, they learn to choose words to express their thoughts and feelings.
Foundational Learning for STEM and Language
While seemingly a simple craft, weaving involves fundamental concepts from science, technology, engineering, and mathematics (STEM).
- Engineering: Designing and building a simple loom, understanding tension, and creating a stable structure involve basic engineering principles.
- Mathematics: Patterns, counting rows, and observing sequences are inherent in weaving, building a strong foundation for logical reasoning and spatial awareness.
- Language: As you weave together, discussing the colors ("What color are you using now?"), textures ("Is that yarn soft or bumpy?"), and actions ("Go over, now under!") provides rich opportunities for vocabulary expansion, descriptive language, and following multi-step instructions.
This cross-disciplinary learning is at the heart of what we do at Speech Blubs. We transform complex communication challenges into engaging, understandable activities. Our award-winning app, for instance, uses a scientifically proven video modeling method where children learn to articulate by watching and imitating their peers, making the learning process both joyful and effective. To see our method in action and understand the science behind our approach, we invite you to explore our research page here.
A Gateway to Screen-Free Connection and Joyful Moments
In a screen-saturated world, finding genuinely engaging, screen-free activities is invaluable. Weaving offers a wonderful alternative, drawing children into a tangible world of creation. It's an activity that can be enjoyed independently, allowing for quiet contemplation, or as a collaborative family project. Imagine sitting together, each member working on their piece, chatting about their day, laughing, and helping each other out – these are the moments of family bonding that foster connection and create lasting memories. These shared experiences are also prime opportunities for natural conversation and language development, making weaving a perfect complement to targeted speech support.
For parents seeking an immediate, effective, and joyful solution for speech support that seamlessly integrates into family life, we encourage you to try Speech Blubs. Ready to get started? Create your account and begin your 7-day free trial today!
Weaving Fundamentals for Little Hands: Key Terms Made Simple
Before we dive into specific projects, let's learn a few simple terms. Think of it like learning the basic ingredients before you start a recipe – it makes everything much clearer for both you and your child!
- Loom: This is simply the frame or device that holds your threads in place while you weave. For kids' crafts, looms can be as simple as a piece of cardboard, a paper plate, a few drinking straws, or even a sturdy stick! It’s the framework that makes weaving possible.
- Warp: These are the threads that are strung onto the loom first. They run vertically (or from the center outwards on a circular loom) and are held under tension. The warp threads form the foundation of your weaving, much like the skeleton of a building. You weave into and around these.
- Weft: These are the threads or materials that you actively weave horizontally (or in circles) over and under the warp threads. The weft is the "filler" that creates the pattern and body of your woven piece. This is the yarn your child will be manipulating with their fingers or a large needle.
- Shuttle: While not strictly necessary for many easy kids' crafts, a shuttle is a tool used to hold and pass the weft yarn through the warp threads more easily. For simple projects, a large plastic needle, a popsicle stick with yarn wrapped around it, or even just fingers can act as a shuttle.
Understanding these terms makes following weaving instructions much simpler and helps kids grasp the fundamental mechanics of how fabric is created.
Gathering Your Weaving Toolkit: Easy-to-Find Supplies
The beauty of easy weaving crafts for kids is that you often don't need fancy, expensive equipment. Many supplies can be found right around your house or purchased very inexpensively, making it an eco-friendly and thrifty activity!
Here's a list of what you might need to gather for your weaving adventures:
- Yarn, String, Fabric Scraps, Ribbon: This is your primary "weft" material. A variety of colors, thicknesses, and textures adds visual interest and sensory appeal. Old T-shirts cut into strips, ribbons from gifts, or even natural twine can be repurposed. This is a fantastic way to use up odds and ends!
- Cardboard: For making simple looms. Cereal boxes, shipping boxes, or even poster board work perfectly. The stiffer, the better!
- Paper Plates: Excellent for circular weaving projects. The rim provides a natural frame.
- Sticks: For nature weaving. Look for sturdy, Y-shaped, or branched sticks on nature walks. This integrates an outdoor element into the craft.
- Old CDs/DVDs: A clever way to upcycle and create unique, shimmering circular looms for dreamcatchers or coasters.
- Drinking Straws: For creating long, narrow woven strips perfect for bookmarks or bracelets.
- Scissors: For cutting yarn, fabric, and loom materials. Of course, adult supervision is always required when using scissors.
- Tape (Masking or Scotch): Useful for securing warp threads and tidying up the ends of projects.
- Large Plastic Needles: Safer for children than sharp metal needles, these are great for passing weft yarn through warp threads, especially on larger looms or for younger children who need a bit of assistance.
- Optional Embellishments: Beads, buttons, pom-poms, feathers, leaves, small shells – anything that can be incorporated to personalize and decorate the finished weaving. This adds another layer of creative choice.
Gathering these materials can be an adventure in itself, encouraging kids to think creatively about what they can use from their environment. This resourcefulness is a wonderful skill to cultivate, fostering an eco-conscious mindset from a young age.
Our Favorite Easy Weaving Crafts for Kids: Step-by-Step Guides & Creative Ideas
Now, let's dive into some specific projects! These ideas are designed to be accessible for various age groups, with tips on how to adapt them for simpler or more complex creations.
1. Cardboard Loom Weaving: The Classic Start
Cardboard loom weaving is often the first introduction to this wonderful craft for many children, and for good reason! It’s straightforward, versatile, and yields satisfying results.
How to Make Your Cardboard Loom:
- Prepare the Cardboard: Take a sturdy piece of cardboard (a cereal box or shipping box works well). The size of your cardboard will determine the size of your weaving. For beginners, a piece roughly 6x8 inches is ideal.
- Make Notches: On two opposite sides (the top and bottom), use a ruler and pencil to mark evenly spaced notches about 1/2 inch apart and 1/2 inch deep. These notches will hold your warp threads. An adult should carefully cut these slits.
- Warp the Loom: Tie one end of a long piece of strong cotton string or yarn to the first notch on one side. Bring the string up to the corresponding notch on the opposite side, loop it through, and then bring it back down to the next notch on the starting side. Continue this process, looping the string tightly around each pair of notches until your entire loom is "warped" with vertical threads. Tie off the end securely. Ensure the warp threads are taut but not so tight they warp the cardboard.
How to Weave:
- Prepare Your Weft: Cut various lengths of yarn, fabric strips, or ribbons. For younger children, wider strips are easier to manipulate.
- The Over-Under Pattern: Tie the end of your first weft strip to the first warp thread. Now, guide the weft over the next warp thread, then under the next, and continue this "over-under" pattern across the entire row.
- Reverse the Pattern: When you reach the end of the row, gently push the weft strip up to snug it against the previous row (if you have one). For the next row, you'll do the opposite: if you went over the last warp thread, start by going under it, then over the next, and so on. This creates the woven pattern.
- Continue and Experiment: Encourage your child to experiment with different colors, textures, and even to leave gaps or create patterns. As they weave, periodically use their fingers (or a fork for older kids) to gently push the weft threads down, making the weaving compact.
- Finishing: Once the weaving is complete, carefully slide the loops off the top and bottom notches. Tie the warp threads together in pairs to secure the weaving. The tails of the weft can be woven back into the piece or simply trimmed. Add a stick or dowel at the top with a hanging loop for a beautiful wall hanging.
Relatable Scenario: For a child who might struggle with fine motor tasks or get easily frustrated, cardboard loom weaving offers a clear, repeatable pattern. A parent can guide their hand through the "over, under" sequence, using verbal cues and tactile assistance. This repetitive motion builds muscle memory and reinforces sequencing skills, which are fundamental for both physical coordination and understanding the order of sounds in words. Discussing the colors and textures, "Let's use the soft blue yarn next!" or "See how this bumpy yellow ribbon feels?" provides valuable language practice.
2. Paper Plate and CD Circle Weaving: Round & Creative
Circular weaving offers a slightly different tactile experience and is perfect for creating coasters, small placemats, or even decorative wall hangings and dreamcatchers.
Using a Paper Plate:
- Prepare the Plate: Take a paper plate and cut an odd number of slits around the rim, stopping about 1/2 to 1 inch from the center. The more slits, the tighter the weave.
- Warp the Plate: Thread yarn through one slit from the back, bring it across the center to the opposite slit, and loop it around the rim to the next slit. Continue spiraling outwards from the center, creating warp lines that radiate from the middle like spokes on a wheel. Secure the ends with tape on the back.
- Weave: Starting from the center, weave yarn over and under the warp threads in a circular motion. Push the rows together as you go. Experiment with different colors to create concentric rings.
- Finish: Once complete, tie off the yarn at the back. The warp threads can be trimmed and secured with glue or tape.
Using an Old CD/DVD:
- Prepare the CD: Carefully cut an odd number of shallow notches around the edge of an old CD or DVD. You can also glue a piece of felt or paper to the back for stability.
- Warp the CD: Similar to the paper plate, string yarn through the notches, crossing through the center hole, to create your warp.
- Weave: Begin weaving in a spiral pattern from the center, going "over" and "under" the warp threads.
- Decorate: These are wonderful for turning into unique dreamcatchers by adding beads, feathers, or other embellishments to the outer edges.
3. Stick Weaving: Nature's Art
This craft beautifully combines nature exploration with textile art. It encourages children to appreciate natural materials and create something rustic and charming.
How to Do It:
- Find Your Sticks: Go on a nature walk and look for interesting Y-shaped, V-shaped, or branched sticks. Thicker, sturdier sticks work best.
- Warp the Stick: Tie yarn to one end of the stick. Wrap the yarn around the branches or forks of the stick, creating warp lines between the different points. You can wrap parallel lines or crisscrossing lines – let creativity lead! Ensure the yarn is taut.
- Weave: Use shorter pieces of yarn or fabric strips to weave over and under the warp threads. Because sticks are often irregular, this type of weaving is more free-form and less about strict patterns.
- Add Natural Elements: Encourage children to incorporate small leaves, flowers (pressed or fresh), grasses, or even tiny pinecones into their weaving for an organic, textural piece of art.
- Hang: A simple loop of yarn can be tied to the top for hanging.
4. Straw Weaving: Bracelets and Bookmarks
Straw weaving is a quirky and clever way to create long, narrow woven pieces. It’s particularly great for making functional items like bookmarks, bracelets, or even doll belts.
How to Do It:
- Gather Straws: You'll need 3-5 drinking straws (reusable ones are great!).
- Prepare Warp: Cut several long pieces of warp yarn, at least twice the length of your desired finished product. Thread one piece of yarn through each straw. Tie the ends of all the warp yarns together in a knot at one end, leaving a tail.
- Start Weaving: Take another long piece of yarn (your weft). Tie it to one of the outermost warp threads near the knot.
- The Technique: Weave the weft yarn over the first warp thread, under the second, over the third, and so on, across all the straws. When you reach the end, push the weft down to the knot. For the next row, reverse the pattern.
- Slide and Continue: As your weaving grows, gently slide the woven section down the straws, making room for more weaving.
- Finish: Once the desired length is achieved, cut the weft yarn and tie it off. Carefully slide the finished weaving off the straws. The warp ends can be braided, tied, or secured with beads to create a bracelet clasp or a decorative bookmark end.
5. God's Eye Weaving: A Classic and Simple Introduction
The "God's Eye" (Ojo de Dios) is a classic craft that introduces basic weaving concepts with just two sticks and yarn. While not traditional loom weaving, it teaches winding, layering, and color progression beautifully.
How to Do It:
- Form the Cross: Take two craft sticks (popsicle sticks work well) and hold them in a cross shape. Tie a piece of yarn around the center to secure them firmly, making sure the yarn crosses over itself to hold the sticks tightly together.
- Wind the Yarn: Hold the yarn-wrapped sticks in one hand. With the other hand, bring the yarn over one stick, around behind it, and then over the next stick. Continue this process, winding the yarn around each stick in turn, moving clockwise or counter-clockwise.
- Build Layers: Each time you wrap, the yarn creates a new layer, slowly covering the sticks and building up the colorful "eye" pattern.
- Change Colors: To change colors, simply tie off the old yarn and tie on a new color, continuing the winding pattern.
- Finish: When the God's Eye is as big as you want, tie off the yarn and trim the ends. A loop of yarn can be added for hanging.
Relatable Scenario: For a child who enjoys repetitive movements and visual progression, the God's Eye craft is highly satisfying. It's an excellent opportunity to reinforce sequencing and turn-taking if done collaboratively. For a child learning to combine words, describing the growing colors and patterns—"red, then blue," "round and round"—can be a fun way to practice short phrases and build descriptive vocabulary.
6. Paper Weaving: Hearts, Bookmarks, and Beyond
While working with paper is different from yarn, paper weaving uses the same fundamental "over and under" concept and is fantastic for fine motor skill development and understanding patterns.
How to Do It:
- Prepare the Base: Take a piece of colored paper (e.g., a square for a heart, a rectangle for a bookmark). Fold it in half.
- Make Cuts: From the folded edge, cut parallel lines towards the open edge, stopping about 1 inch from the edge. These are your "warp" strips.
- Prepare Weft Strips: Cut contrasting colored paper into strips of the same width as your "warp" cuts.
- Weave: Unfold your base paper. Take a weft strip and weave it over and under the warp strips. Gently push it up to the fold. For the next weft strip, reverse the pattern.
- Create Designs: Experiment with different colors and patterns. Paper weaving is excellent for creating decorative cards (like woven hearts for Valentine's Day), bookmarks, or even simple artworks.
Adapting Weaving for All Ages and Abilities
The beauty of weaving is its adaptability. For younger children (preschool-kindergarten), focus on large motor movements, wider materials (fabric strips), and simple "over, under" patterns. The emphasis should be on the sensory experience and the joy of creation, not perfection. For older elementary children, you can introduce more complex patterns, finer yarns, and challenge them to design their own loom or create functional items. The goal is always to foster a love for communication and creation, building confidence one joyful, tangible step at a time.
Unsure if your child could benefit from a little extra support in their communication journey? Take our quick 3-minute preliminary screener to get a simple assessment and a free 7-day trial of Speech Blubs. It's a fantastic first step! Take the Screener Here.
The Speech Blubs Difference: How We Support Your Child's Journey
Just as weaving builds foundational skills through hands-on engagement, Speech Blubs provides a powerful, scientifically backed tool to support your child's speech and language development. We understand the challenges parents face, and our app is designed to seamlessly integrate into your family's routine, turning screen time into "smart screen time."
At Speech Blubs, we believe in the power of imitation and connection. Our unique "video modeling" methodology is at the heart of our approach. Children learn by watching and imitating their peers on screen, activating crucial mirror neurons in the brain that are essential for learning new sounds and words. This active, engaging process is a world away from passive viewing and transforms screen time into a dynamic learning experience.
Our app is more than just a tool; it's a reflection of our founders' personal journeys. Having experienced speech problems themselves, they built Speech Blubs to be the immediate, effective, and joyful solution they wished they had. We are committed to helping the 1 in 4 children who need speech support find their voice, building their confidence, and reducing frustration.
Realistic Expectations and Powerful Support
We never promise overnight transformations or guaranteed outcomes. Instead, we focus on the profound benefits of the process: fostering a love for communication, building confidence, developing key foundational skills, and creating joyful family learning moments. Speech Blubs is a powerful supplement to a child's overall development plan and, when applicable, professional therapy. It’s designed to be used with adult co-play and support, turning learning into a shared, connecting experience. Many parents have seen remarkable progress; you can see what other parents are saying about their child's success with Speech Blubs by visiting our testimonials page.
Unlocking the Full Potential with the Yearly Plan
To ensure your child gets the most out of Speech Blubs and enjoys an uninterrupted learning journey, we offer flexible subscription plans. We encourage you to choose our Yearly Plan, which provides the best value and access to exclusive features:
- Monthly Plan: Priced at $14.99 per month.
- Yearly Plan: Our most popular and highly recommended option, at just $59.99 per year. This breaks down to an incredible value of just $4.99 per month – a 66% savings compared to the monthly plan!
The Yearly Plan isn't just cheaper; it also includes:
- A 7-day free trial: Giving you and your child a full week to explore all the engaging activities and see the benefits firsthand.
- The extra Reading Blubs app: Expanding their learning from speaking to reading, a perfect complement to language development.
- Early access to new updates: Ensuring your child always has the latest and most engaging content.
- 24-hour support response time: Our dedicated team is always there to help you on your journey.
The Monthly Plan, while flexible, does not include these additional high-value benefits. To truly empower your child's communication journey and unlock all these amazing features, choosing the Yearly Plan is the clear best choice. Download Speech Blubs on the Apple App Store or Google Play Store to begin your 7-day free trial today!
Conclusion
Engaging in easy weaving crafts for kids offers a treasure trove of developmental benefits, from honing fine motor skills and nurturing patience to sparking creativity and fostering a love for discovery. These hands-on activities provide invaluable opportunities for children to learn, grow, and express themselves in tangible ways. The joy they experience creating something with their own hands—a colorful wall hanging, a practical bookmark, or a unique piece of nature art—builds a strong foundation of confidence and self-expression.
Just as weaving strengthens the pathways for physical dexterity and cognitive sequencing, Speech Blubs provides a supportive and joyful path to develop communication skills. We are committed to helping your child find their voice, speak their minds and hearts, and connect with the world around them.
Don't miss out on the incredible value and comprehensive support our Yearly Plan offers. Start your child's journey today by choosing the Yearly Plan to receive your free 7-day trial and unlock access to the Reading Blubs app, early updates, and dedicated support. Download Speech Blubs now on the Apple App Store or Google Play Store or create your account on our website to begin a journey of joyful learning and confident communication.
FAQ: Your Weaving Questions Answered
Q1: What age is best to start weaving with kids?
A: Children as young as 3-4 years old can begin with very simple weaving activities, like large paper weaving or God's Eye crafts using thick yarn and sticks. For cardboard loom weaving, ages 5-7 are often a good starting point, as they have developed more fine motor control and patience. The key is to adapt the complexity and materials to the child's developmental stage, focusing on the process and enjoyment rather than perfection.
Q2: What are the main benefits of weaving for a child's development?
A: Weaving offers numerous benefits: it significantly enhances fine motor skills and hand-eye coordination, builds patience and concentration, fosters creativity and problem-solving abilities, introduces basic STEM concepts (patterns, sequencing, structure), and provides a rich sensory experience through different textures. It also offers a wonderful opportunity for screen-free engagement and family bonding.
Q3: What if my child gets frustrated while weaving?
A: Frustration is a normal part of learning! If your child gets frustrated, take a break. Simplify the project, offer more hands-on help, or switch to a different, less intricate craft. Focus on praise for effort rather than the outcome. Remember that the goal is the joyful process of creation and skill-building. You can also turn it into a shared activity where you weave together, taking turns.
Q4: How does weaving connect to speech and language development?
A: Weaving indirectly supports speech and language development by strengthening foundational skills. The fine motor control developed in weaving benefits the precise muscle movements required for speech articulation. The practice of sequencing ("over, under") reinforces cognitive ordering skills, important for sentence structure and story narration. Furthermore, discussing colors, textures, and actions during weaving creates natural opportunities for vocabulary expansion, descriptive language practice, and following multi-step instructions, all vital for communication growth.
About the author